I was sorting through my picture albums on my computer today, and found some that I thought I might share with you all! Here's a look at what I sometimes like to do during my free time, when I feel particularly inspired by the Food Network or some trendy nail art!
 |
| I'd made this for my honey Mikey a while ago when I was visiting him at school. It's a cheesecake with mascarpone cheese, almond graham crust, and some nutella drizzling on top. I simply just mashed together equal parts of graham crackers with some crushed bits of roasted almonds and then mixed it together with some butter to create the crust. Then I added some mascarpone to the cheesecake mixture to give it a creamier texture, and then into the oven it went! Finally I piped some Nutella on top because I felt that it would blend well with the nuttiness of the almond crust. I think i received some positive feedback from Mikey haha. |
 |
I'd wanted to recreate these adorable little cookie monster cupcakes after seeing them in a blog! I was also making some money on the side by selling candy during the day at school, so I decided, why not change it up by selling some baked goods!
For these little munchkins I used a devil's food prepared cake mix (I was lazy) and baked it as per usual. I then cut a small opening on the lower third of the cupcake for the chocolate chip cookies, and piped some homemade blue vanilla frosting with a star tip to create the "fuzziness". Then I glued some bittersweet chocolate morsels with frosting on some mini marshmallows to create the googly eyes. Stick the cookie in the mouth, and voila you have your own adorable, irresistible cookie monster cupcakes!! |
 |
| Another shot of the little monsters |
 |
| I think I'd made these for a Christmas party last year. These are yellow cupcakes with cream cheese frosting flavored with a touch of lemon juice and a raspberry thumbprint in the middle. I decorated the tops with colored sugar that I'd made with some food coloring, and plopped down some crushed almonds and broken chocolate pieces. |
 |
| This one just has crushed almonds on top with some chocolate on top |
 |
| A look at the raspberry thumbprint! |
 |
| Sprinkled with a touch of red sugar and almonds |
 |
| Perfectly matched the holiday season didn't they? |
 |
| The finished product |
 |
I made these quiches as appetizers for our Christmas dinner at home. I was fairly satisfied with them, although I could have succeeded in keeping them round shape when taking them out of the baking pan!! They were made with a mixture of egg, cheese, bacon, and spinach, and then baked until crisped and golden on top. My family approved!
That's all the baked goodies I have for now! Stay tuned for more in the future as I think of some other recipes I can work on :)
_______________________________________________________________________________________ |
Now onto some nail art!! My nails are now currently bare, because I believe in allowing my nails to breathe and have a chance to bask in some sunlight. I usually like to stick with wine red polishes, corals, purples, and golds when I want it to be one color. At times I also like to do some designs on my nails, such as zebra stripes, tiger stripes, and cheetah spots! I guess I can say I have quite a passion for animal prints haha. But sadly I didn't think to take any pictures of those :( I'll make sure to remember in the future! But for now I'll share some designs that I
have documented.
 |
| This is one of the first designs I'd ever attempted a little over a year ago, which explains the polish on my skin and the uneven distribution of the red polish. But for my for attempt, I'd have to say I was fairly happy with the results after I'd cleaned up the edges haha. |
 |
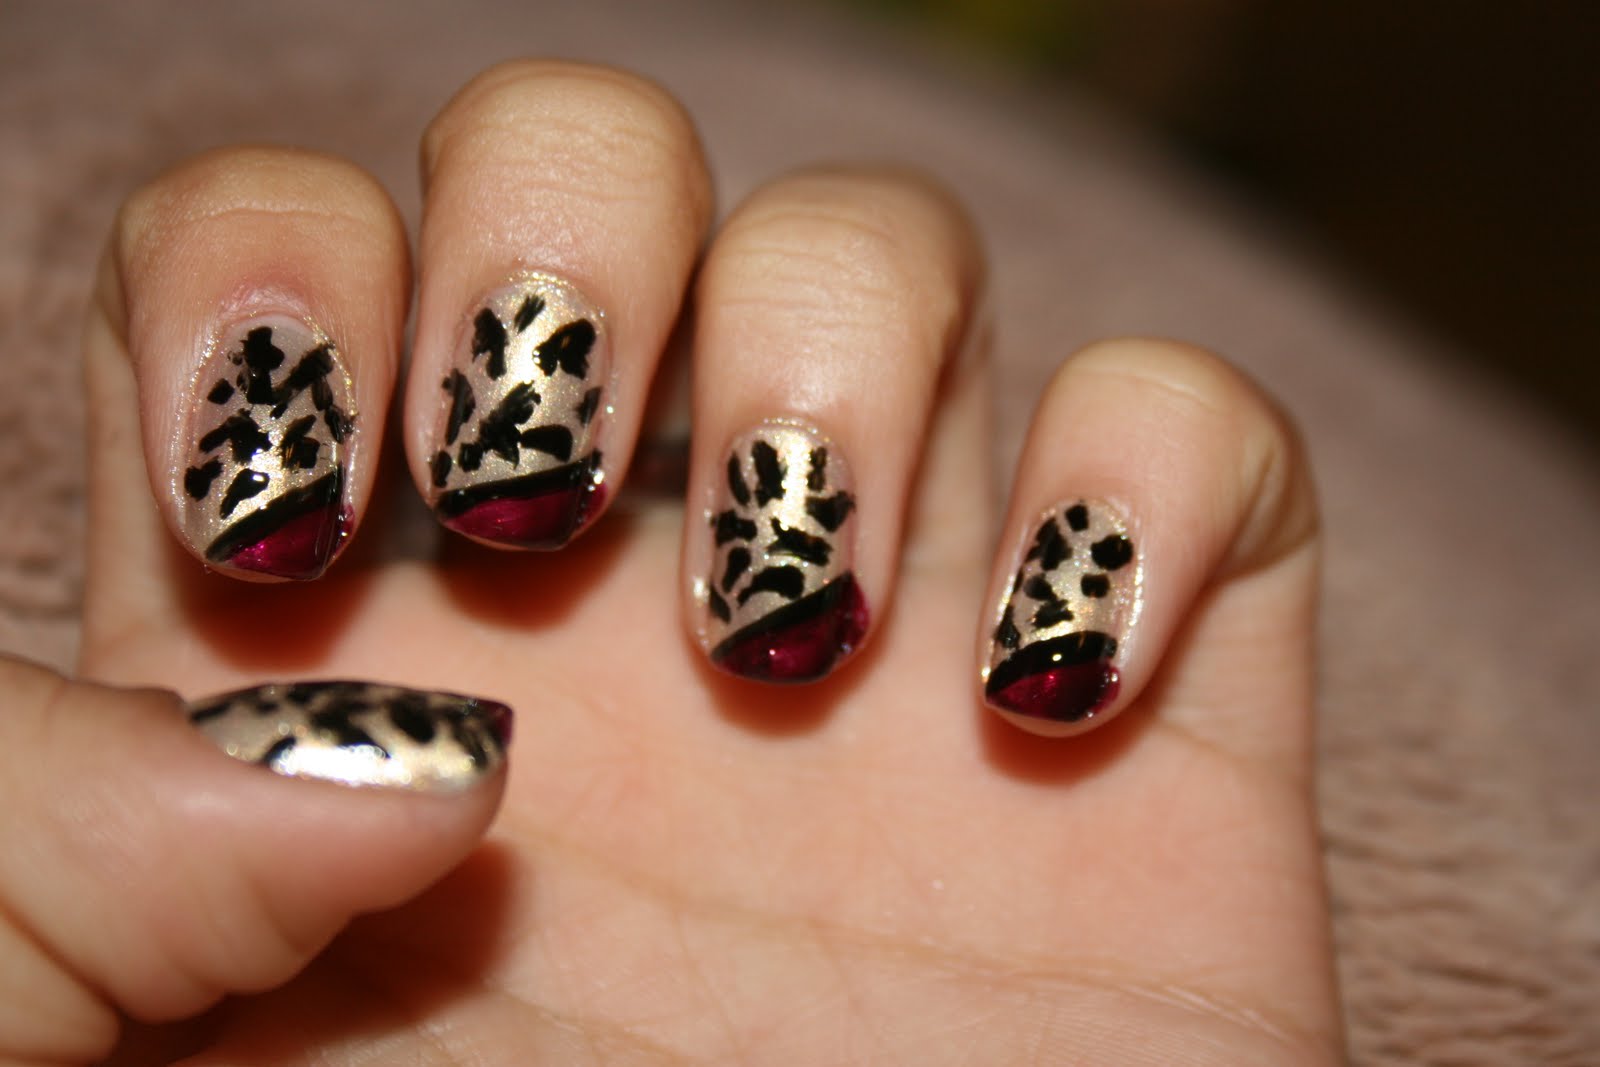
| I used a gold polish as a base and then a ruby red as the color across the top. Then I used a black design tip to draw on the spots and even out the edge along the red triangle |
 |
| I believe I'd painted this in the fall, and I was inspired by some art deco designs. I painted half of my nail with this taupe-y gray, then the half with a deep opaque purple. Then I used a gunmetal color to color the top half of that purple to create that mosaic-like design. To finish up the entire nail, I used a gold design tip and drew it between the gunmetal and the purple, stopping at the taupe gray, then used a silver design tip and ran in along the center of my nail. |
 |
| This one has had to be one of my favorites!! I was inspired by the crackle and shatter polishes, but I'd wanted a slightly different, more linear look. I'd have to say that the design kind of reminded me of tree bark at the end, but that could just be me. |
 |
I'd used a gold polish as a base, and the rest was the work of my trusty black design brush. Though he was getting goopy at that time because I'd used it sooo many times already, the finished product came out looking pretty neat! I just went with it and drew lines and dots wherever I felt like they belonged, and I liked how it looked at the end :)
Thanks for checking out my blog! I enjoyed sharing my baked goodies and some nail art with you all, and hopefully you've enjoyed them as well :) If there are any guys here on this blog, maybe making a couple of those cookie monster cupcakes will impress that special girl in your life :p
Until next time!
xoxo,
Valerie |


No comments:
Post a Comment